Clickteam's Install Maker is most probably one of the easiest installer packaging utilities available today. Besides being free, it also is sufficient to produce AMORE Multimedia Installer EXE files.
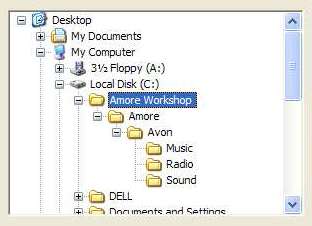
This tutorial assumes an OFPEC Tag of "Avon" (my identifier) and is based on packaging the audio files referred to in this sample config.cpp file. The first thing you have to do is to create a work copy of an AMORE Repository folder within any other directory, as I've done on my computer, as shown below:
As the above example shows, I've placed my AMORE Repository within an arbitrarily named directory called "Amore Workshop". You must also create a subdirectory named with your OFPEC Tag, within the AMORE Repository folder. Finally, within the OFPEC Tag name folder, create Music, Radio and Sound folders, as shown above.
Now, copy the audio files you wish to distribute into the appropriate Music, Radio and Sound folders. Again, the examples that follow are based on audio files referred to in this sample config.cpp file. In addition to the audio files, make sure you place a text documentation file in the OFPEC Tag name subfolder. Make sure that the text documentation file's name conforms to AMORE's file naming conventions.
I suggest using the following sample text as a documentation template for AMORE Multimedia Installer EXE files:
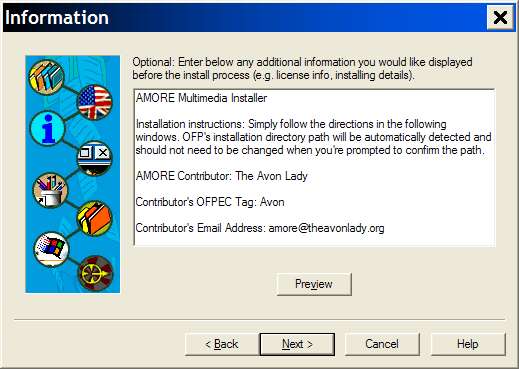
| AMORE Multimedia Installer Installation instructions: Simply follow the directions in the following windows. OFP's installation directory path will be automatically detected and should not need to be changed when you're prompted to confirm the path. AMORE Contributor: The Avon Lady |
It's time to run Clickteam's Install Maker. When you do, the following window will be displayed. Leave the checkbox unchecked and click NEXT to continue using Install Maker's wizard.

You'll now be prompted to specify the directory that contains the files you want to have packaged. In our example, I specified the "Amore Workshop" directory, mentioned earlier in this tutorial, that contains the work copy of the AMORE Repository its subfolders and the audio files to be packaged. Make sure the INCLUDE SUB-DIRECTORIES option is checked, as in the following window:
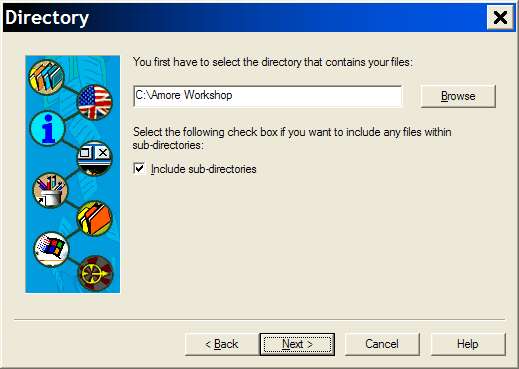
Either type in the directory name, as above, or click the BROWSE button and you'll be prompted to select the directory, as shown below:

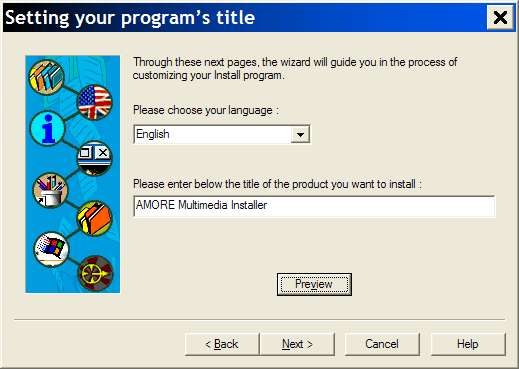
In the following window, key in "Amore Multimedia Installer" (without the quotes) in the lower TITLE field, as shown below, and click NEXT to continue.
Leave everything blank and unchecked in the following SHELL window and press NEXT to continue.

Remember that text documentation file you created at the start of this tutorial for your AMORE Multimedia Installer? Simply copy and paste it into the INFORMATION text box in the following window, as I've done below:
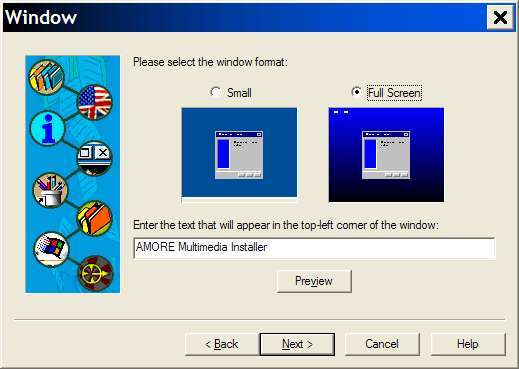
Select the FULL SCREEN window format option and key in "AMORE Multimedia Installer" (without quotes), as shown in the following window:
You can choose a bitmap (BMP) file to replace Install Maker's default picture, which you've been seeing all along on the left hand side of these windows. As is mentioned, the bitmap's height should be 280 pixels and its width should be 128 pixels.
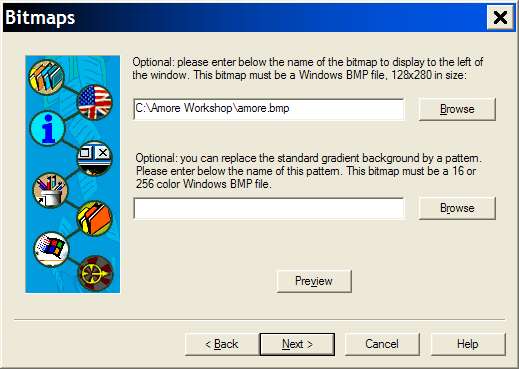
In the BITMAPS window above, I selected a bitmap file of my own that I created for AMORE. If you want to use it, just save the BMP file picture below:

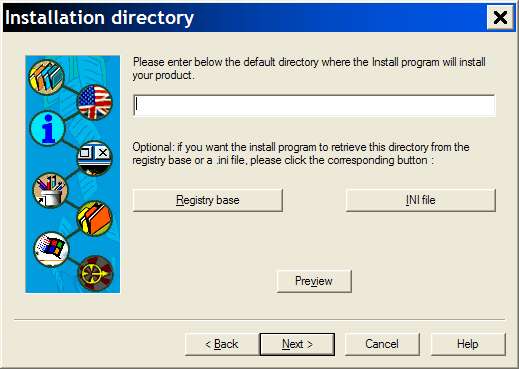
Install Maker's wizard will now prompt you for the name of the directory on every OFP player's PC into which your AMORE Multimedia Installer audio files are to be installed. What we need to set here is the name of OFP's install directory. The directory path, folder names and hard disk drive can differ from one player's PC to another.
Fortunately, OFP builds a Windows Registry key on every PC where OFP is installed that contains the precise directory path that we need. To instruct Install Maker to obtain OFP's installation directory path from each player's Windows Registry, leave the DEFAULT DIRECTORY field in the following window blank and click on the REGISTRY BASE button.
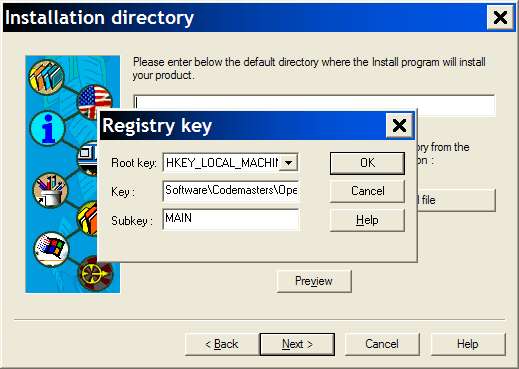
In the REGISTRY KEY window that pops up, select HKEY_LOCAL_MACHINE in the ROOT KEY field, precisely specify "Software\Codemasters\Operation Flashpoint" (without quotes and note the blank between the words "Operation" and "Flashpoint") in the KEY field and type in the word MAIN in the SUBKEY field, exactly as shown below. Then click OK to get back to the INSTALLATION DIRECTORY window. Then click NEXT to continue.
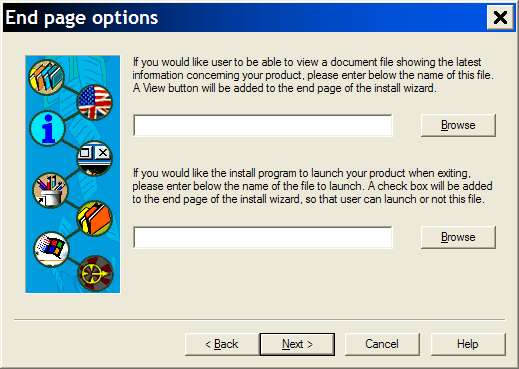
Just leave everything blank in the following END PAGE OPTIONS window and click NEXT to continue.
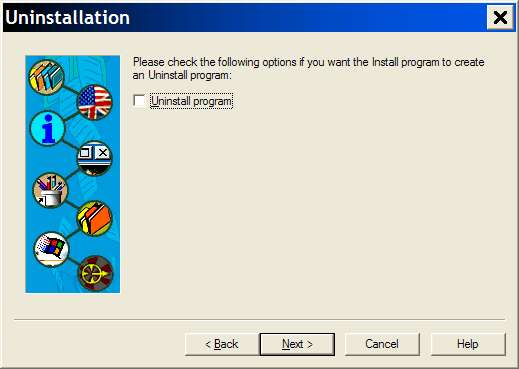
Make sure the UNINSTALL PROGRAM option is unchecked in the following UNINSTALLATION window and click NEXT to continue.
We're finished with the Install Maker's wizard and we've got just a little more work till we're done. Check the DO NOT BUILD THE INSTALL PROGRAM option on the END window and click FINISH to close Install Maker's wizard.

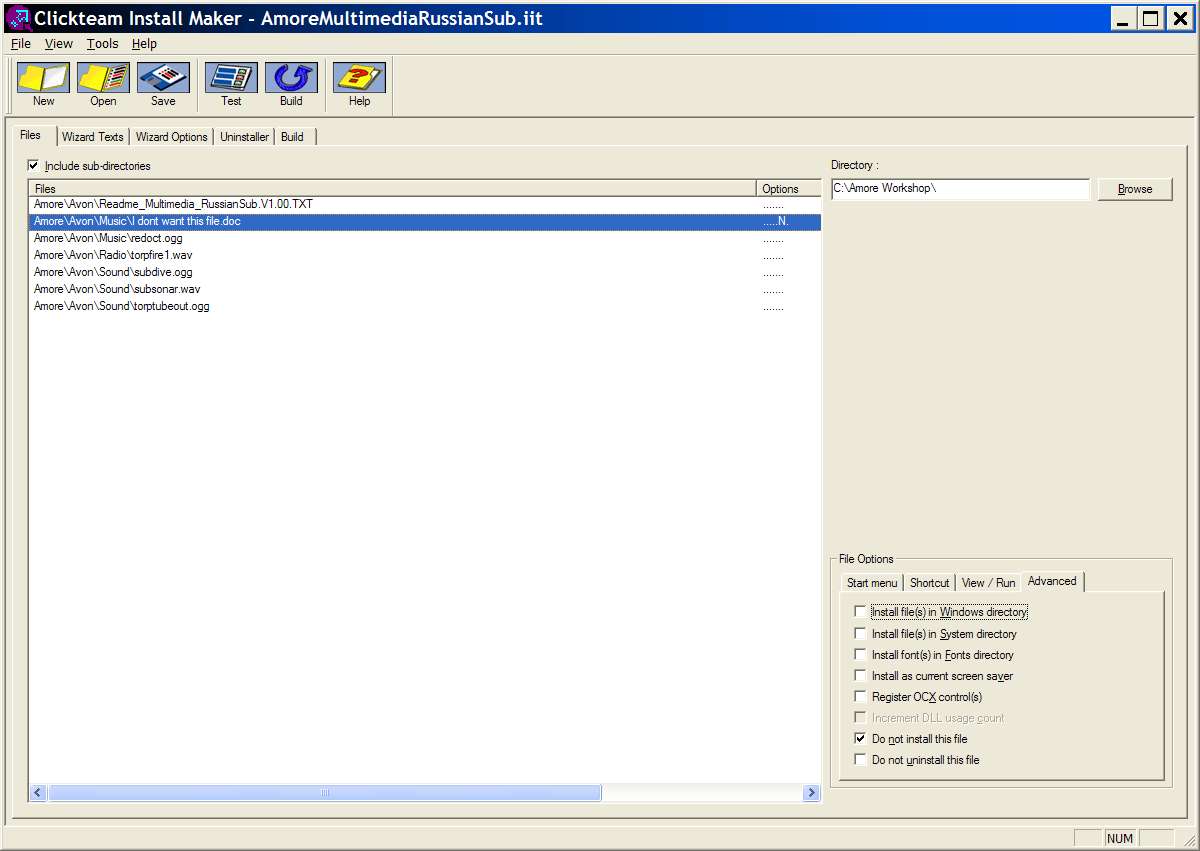
This will place you in Install Maker's main window, as shown below. Within the main window, the FILES tab window will display all the files found within my Amore Workshop directory.
The first important thing to notice are the path names Install Maker has retained for the files. Yours should look similar, with an upper folder name of Amore, followed by your OFPEC Tag name, followed by the appropriate Music, Radio or Sound subfolder and ending with the audio file names you want packaged. Make sure you always keep the INCLUDE SUB-DIRECTORIES option checked in order to achieve these results.
The second important thing to notice is that Install Maker will list every file it found within my Amore Workshop folder and its subfolders. Looking at the second file listed, you can see a file conveniently named for this tutorial "I dont want this file.doc". In order to exclude a file from packaging, first select the file by clicking on its entry in the FILES column, as shown below. Then clicked on the ADVANCED tab in the lower right hand corner and check the DO NOT INSTALL THIS FILE option. When you do, an "N" will appears in the OPTIONS column of the selected file, as shown in the example below:
We're finished working under the FILES tab window. Now click on the WIZARD TEXTS tab and, if it's not already displayed, select PRESENTATION from the PAGE drop-down list. We're going to slightly modify the default text that is presented to the player when the AMORE Multimedia Installer is first started. To change these text lines, you must double-click each line separately.
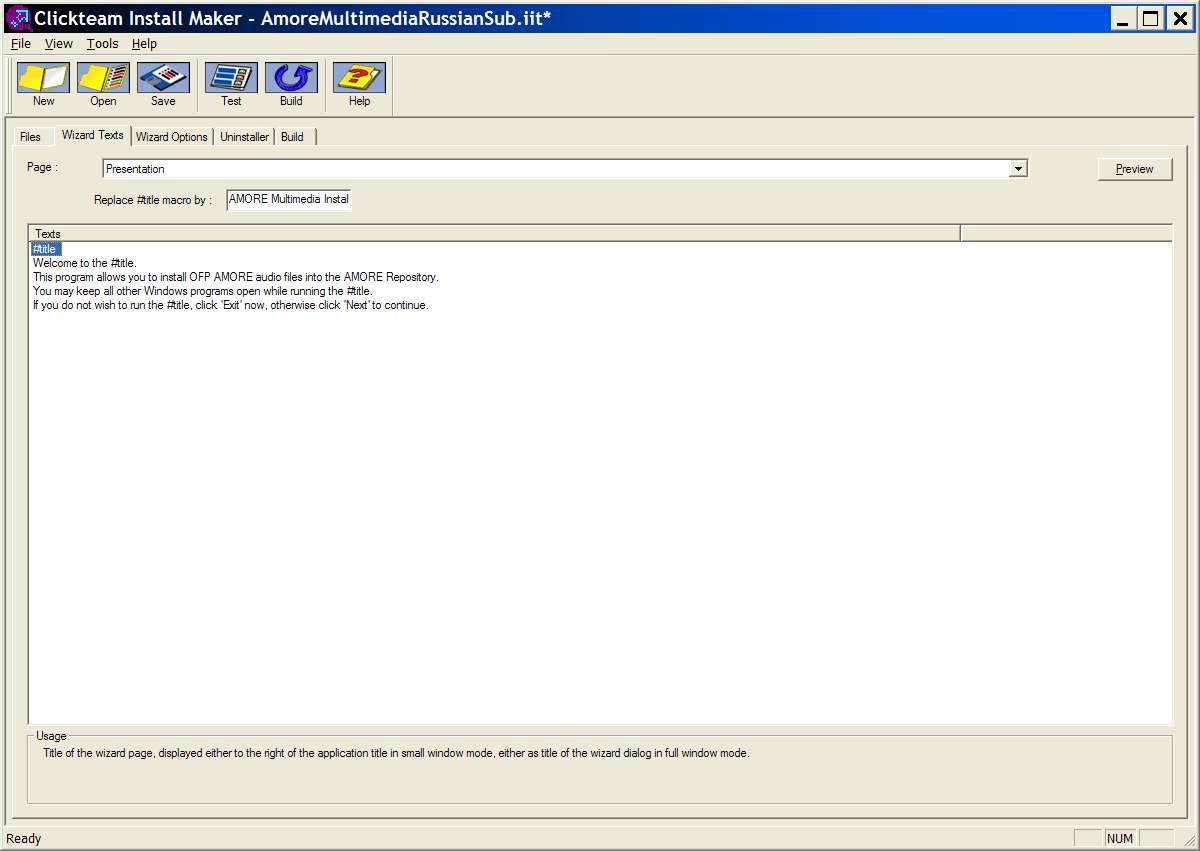
I highly recommend that you change the PRESENTATION text to exactly what's shown in the above example. To see how this will appear to the player running your AMORE Multimedia Installer, click on the PREVIEW button on the Install Maker window's upper right side. The following preview window will appear:
Looks good! Well, at least it looks good enough. To quit the preview window, just click on either NEXT or EXIT to get back to Install Maker's main window.
It's time to save our project settings, both for safety's sake and in case you want to change anything later on or use this as a template for other AMORE Multimedia Installer projects in the future.
Click on FILE on Install Maker's menu bar and select SAVE AS. Give your project settings file a unique name that will always remind you what's packaged within. You can save it in any directory you want on your PC. I've saved this sample example in a file called AmoreMultimediaRussianSub.IIT (the "IIT" file type suffix is automatically appended onto the file name by Install Maker). Press SAVE and your project settings, will be saved for the future.

The above IIT file is not what the OFP player needs. What you still need to do is to "build" the executable AMORE Multimedia Installer program that the OFP player will run to install your contributed AMORE audio files. To do this, click on the BUILD button in Installer Maker's toolbar. You'll be prompted to save your AMORE Multimedia Installer EXE file.
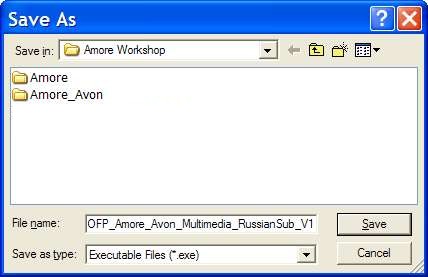
Choose the directory of your choice in which to save your AMORE Multimedia Installer file and set the FILE NAME field to a file name that conforms to AMORE's file naming conventions for AMORE Multimedia Installers, as was done in the above example.
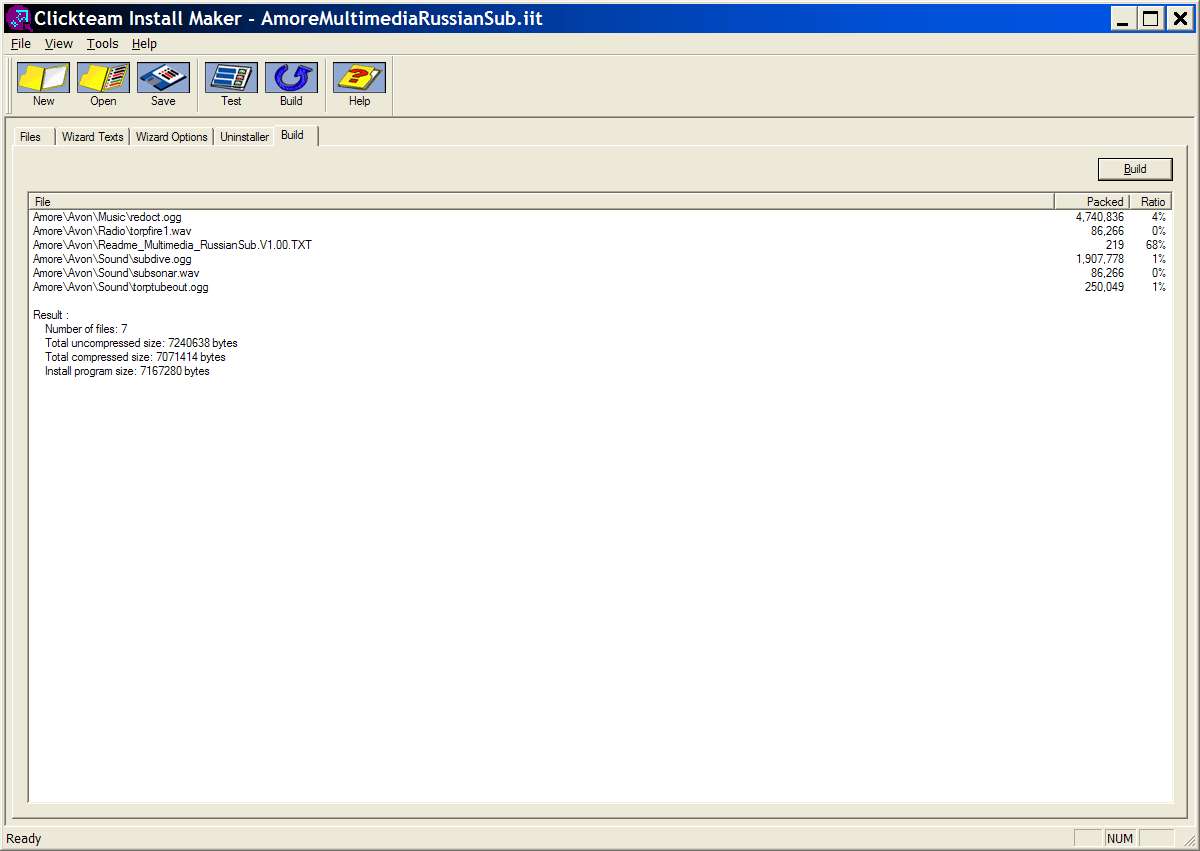
When you click on the SAVE button above, Install Maker will build your AMORE Multimedia Installer file and present you with a final report in the BUILD window, as in the following example:
Congratulations! You've built your first AMORE Multimedia Installer executable file. There is, however, one last thing you should do - test it. No, I don't mean play around with the TEST button in Installer Maker's toolbar. That just runs you through the screens without actually doing anything. I mean that you yourself must run your newly created AMORE Multimedia Installer executable file to be certain it does what you want it to do.
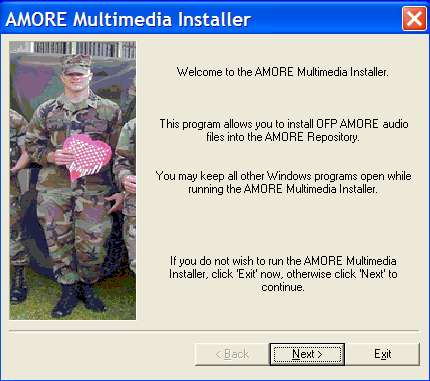
When you begin running your AMORE Multimedia Installer, you'll get the initial presentation window below. Check this window's and each following window's text to make sure that there aren't any spelling or grammar errors introduced by you.
Keep clicking NEXT until the DIRECTORY window is displayed. If OFP is installed on your PC, make sure OFP's installation directory path is displayed as the default installation path, as in the example window below:
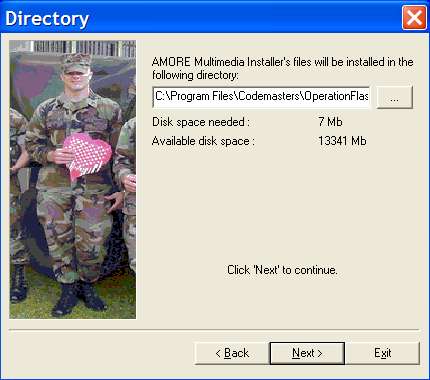
If the path shown is blank, then you either did not accurately specify the path's Windows Registry key, as discussed earlier, or OFP is not installed correctly or isn't installed at all on your PC. If you think the problem is with your Windows Registry key specification, go back to Install Maker, fix it under the WIZARD OPTIONS tab in Install Maker's main window, save your project again, rebuild your AMORE Multimedia Installer executable file and run it again.
For testing purposes, you don't need to install it to OFP's installation directory, especially if you have a working AMORE Repository already in place there. What I like to do for testing purposes is to set my directory to something that doesn't exist and can be deleted on the fly. As an example, set the directory to "C:\OFP Test Directory" and click next.
After you've completed running the AMORE Multimedia Installer, check the contents of your test directory. It should contain an AMORE Repository folder and all of the other expected subfolders and file contents within them.